Your priority is to have a strong early game with your Searchers, so you can prepare your Wisdom Characters and your key plays for the following turns.
Cards to Prioritize
Atlas EB05-050 is a very strong start. It immediately lets you search for a Wisdom card.
Charlotte Pudding OP17-109 is also valuable very early. It provides card advantage. Later, after attaching 2 DON!! to bring it to 6000 Power, you can use your Leader effect to make it Active and attack a second time.
Lilith OP13-113 is another search option. It also has a Trigger, increasing the number of cards that can generate value from your Life.
Above All, Prepare Your Next Turns
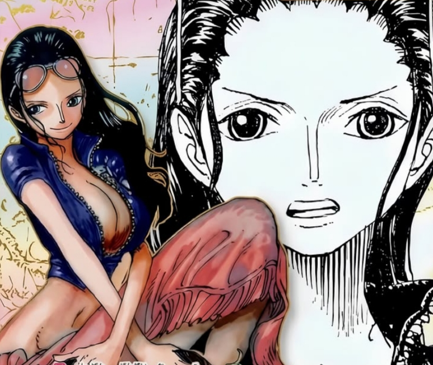
A good hand should also give you access to your 5- and 6-cost Characters, especially Gloriosa EB05-052, Nami EB05-055, and Nico Robin EB05-016.
Nami is especially important because it is one of your main healing sources. Nico Robin plus Nami is also a very strong sequence for developing your board while recovering a Life.
Avoid a Hand That Relies Too Much on Situational Cards
Silvers Rayleigh OP14-108 is mainly included in this decklist for the strength of its Trigger, so it is not a card to build your opening hand around.
Finally, Shanks OP17-022 is your late-game finisher: you do not need to have it from the start.
Ideal Mulligan
Look primarily for an opening hand with Atlas, Pudding, or Lilith, plus a way to continue developing with Gloriosa, Nami, or Nico Robin.
The goal is to avoid a hand full of late-game cards or cards whose Triggers only become truly useful once your Life is low enough.
Game Plan & Curve
Early Game - Search and Card Advantage
Your early turns are mainly for finding your pieces and preparing your board. Atlas EB05-050 and Lilith OP13-113 give you access to your next cards, while Charlotte Pudding OP17-109 provides card advantage. Pudding can then become a real attacker: with 2 DON!! attached, it reaches 6000 Power, can attack, be reactivated with the Leader effect, then attack a second time.
Mid Game - Play Your 5- and 6-Cost Characters
This is where your board starts to gain real value. Gloriosa EB05-052, Nami EB05-055, and Nico Robin EB05-016 make up a large part of your important plays. The Nico Robin to Nami sequence is especially strong because it develops your board while recovering a Life. On the following turn, Nami and Robin can use your Leader effect to make multiple attacks as long as you do not raise them above 6000 Power. Your goal is not simply to play one large Character: you gradually want several 6000-Power attackers that can apply repeated pressure.
Trafalgar Law - Develop Your Board While Reusing Nami
Trafalgar Law OP13-031 can return Nami to your hand and let you play it again. This interaction is especially valuable because the Character played by Law arriving Rested is not a real problem for Nami: if your opponent KOs it, its removal can let you heal through your Leader effect; otherwise, you can use your Leader effect to activate it. Law therefore gives you another way to use your Life-recovery effects while developing your board.
Use Your Leader to Multiply Attacks
One of Robin's main strengths is being able to make a Character with 6000 Power or less Active, allowing it to attack again. This works especially well with Characters such as Pudding or Nami: instead of putting all your DON!! into one large attack, you can create several attacks around 6000 Power.
Manage Your Life as a Resource
The deck has many ways to heal, but some cards become better as your Life decreases. Nojiko has a Trigger that can only be used when you have 2 Life or less. Do not treat healing as something to trigger automatically: your Life total directly affects its value.
Late Game - Use Shanks to Open the Board and Finish
Shanks OP17-022 is your main finisher. It becomes especially important against decks that protect themselves with several Blockers. In addition to having Rush, Shanks can rest those Blockers, then gives you another attack to use through the DON!! made Active. Against OP12 Rosinante in particular, stacking Blockers is not enough to stop Robin once Shanks is in play.
Watch Out for 7000+ Power Leaders
This is one of the deck's biggest weaknesses. Your Leader can only make a Character with 6000 Power or less Active. Against a Leader that reaches 7000 or 8000 Power, your first 6000-Power attack becomes ineffective. OP14 Law shows this clearly with EB04 Zoro, then OP17 Newgate: once the opposing Leader is at 7000 or 8000 Power, double 6000-Power attacks lose a great deal of value and your Leader effect becomes much harder to use.
The Weakness to Keep in Mind - Bottom Deck
Your healing plan works when one of your Wisdom Characters is KO'd, but not when it is sent to the bottom of the deck. This is especially problematic against cards such as Gravity Blade: you lose your Characters without receiving the expected heal. Against OP12 Kuzan in particular, several bottom-deck effects can gradually break your board and your ability to maintain pressure.
Tech Cards
Nojiko EB05-057
Nojiko is one of the most debatable cards in this version of the decklist. Its Trigger can provide value, but the condition tied to your Life total is regularly an issue: Robin heals enough that Nojiko is often revealed while you still have too much Life to use its Trigger. It still has the advantage of being a 2000 Counter and can be played when you do not have access to your Searchers early.
Silvers Rayleigh OP14-108
The three Silvers Rayleigh are mainly included for their Trigger. It is one of the best yellow Triggers available, with the ability to KO a Character with 7000 base Power. Its inclusion adds another threat directly from your Life.
Megalo EB04-018
Megalo has several roles in the deck. With 2 DON!!, it can reach 6000 Power, allowing it to attack and then use Robin's Leader effect to attack a second time. If you make it Rest with its On Play effect, it can KO a Rested Character with 8000 Power. Against OP12 Kuzan in particular, Megalo can be played as an answer to Issho.
Gloriosa EB05-052
Gloriosa requires specific management. You can trash it to prevent taking damage, but this does not trigger Nico Robin's heal: Gloriosa trashes itself, so it is not KO'd. Conversely, if your opponent attacks Gloriosa and KOs it, you can use Robin's heal. It is better not to sacrifice Gloriosa too quickly and to save its effect for situations where preventing damage is truly necessary.
Borsalino EB04-058
Borsalino is mainly included to strengthen the deck's ability to recover Life. Together with Nami, the deck has multiple healing sources. Some situations even allow several heals in a row to quickly rebuild your Life and extend the game.
Alternatives Considered
Baby 5
Baby 5 is a possible replacement for Nojiko, which is too often limited by its Life condition.
Removal Protection
Cards that protect against removal are also possible, especially Bonney or potentially Laboon. The goal would mainly be to protect your Characters from bottom-deck removal or being returned to hand, because those forms of removal bypass your ability to heal when a Character is KO'd.
Teach OP16
Teach OP16 could be interesting, but it is too slow.
Matchups
OP14 Law
The main problem appears when the Leader greatly increases its Power with EB04 Zoro or OP17 Newgate. At 7000 or 8000 Power, your 6000-Power Characters become much less effective and your Leader effect loses much of its value.
While the Leader remains at normal Power, look to use your 6000-Power Characters to multiply attacks with Robin's effect.
Your ability to heal with Nami, Borsalino, and Trafalgar Law can extend the game, but it does not solve the problem of a Leader that remains above 6000 Power.
If your opponent keeps that high Power for several turns, you may have to slow down and wait for it to end instead of making several low-value attacks.
OP12 Rosinante
The many Blockers do not necessarily stop Robin. Your number of attacks already lets you pressure them.
Shanks OP17-022 becomes especially important in the late game: it can rest opposing Blockers and open the way for your attacks.
Your healing can also offset damage from opposing Characters. Against opposing Rosinante and Law, the idea is to outheal their damage with Nami and Borsalino.
Once your board is developed enough, keep multiplying 6000-Power attacks rather than letting opposing Blockers completely dictate your attacks.
OP13 Sabo
Sabo can make many attacks quickly, including several around 6000 or 7000 Power. You must be careful not to get overwhelmed before your board is established.
Shanks OP17-022 can completely change a turn when the opposing board is full. It can deal with Loki, then help you regain control over the other Characters.
Your Leader effect can help you attack opposing Characters several times to force Counter, but you need to actually remove them: putting several attacks into a Character that your opponent ultimately keeps can cost you a great deal of pressure.
Do not rely on your opponent to KO your small Searchers and give you free healing.
OP12 Kuzan
Bottom-deck removal is one of Robin's biggest problems. Unlike a KO, it does not let you use your heal when your Characters leave the board.
Gravity Blade is especially problematic because it can remove your Characters without triggering your Life-recovery plan. Several Gravity Blades can significantly reduce your board pressure.
Try to maintain pressure with repeated 6000-Power attacks when you have the opportunity. Waiting an extra turn to set up more attacks can give Kuzan time to find another answer and reduce your board again.
Megalo EB04-018 can help handle threats such as Issho, but this matchup especially highlights the potential need for protection against removal other than KO effects.
7000+ Power Leaders
This weakness is not limited to OP14 Law. Leaders that can naturally or regularly stay above 6000 Power, such as OP11 Nami or OP13 Roger, are problematic.
Your Leader can only make a Character with 6000 Power or less Active. You are therefore normally encouraged to build your double attacks around that threshold.
Against a Leader with 7000 Power or more, the first 6000-Power attack becomes much less threatening, greatly reducing the value of your Leader ability.
Tips
Build your double attacks around Characters at 6000 Power. Pudding, Nami, and Megalo can use Robin's effect to attack, become Active, then attack a second time. Do not unnecessarily go above 6000 Power on the Character you want to make Active again.
Do not sacrifice Gloriosa too easily. Its effect trashes it and therefore does not trigger Robin's heal. If your opponent attacks Gloriosa and KOs it, you can heal instead. Use its effect to prevent damage mainly when it becomes truly necessary.
Use Trafalgar Law to reuse Nami. Law can return Nami and let you play it again to recover Life once more. The fact that it enters Rested is not a problem: if your opponent then chooses to KO it, you can use the heal again.
Do not automatically protect every Character. Some can recover Life for you when they are KO'd. Depending on the situation, letting Nami or another relevant Character be removed can be better than spending several Counter cards to keep it.
Watch your Life total before relying on your Triggers. Nami and Nojiko can be in your Life without being able to fully use their Trigger while you are still too high on Life. The deck's substantial healing makes this situation relatively common.
Adjust your attacks against high-Power Leaders. Against a 7000- or 8000-Power Leader, chaining 6000-Power attacks loses a great deal of value. This is a direct weakness of Robin because her effect can only reactivate Characters at 6000 Power or less.
Identify removal that bypasses KO effects early. Your heal works with a KO, but bottom-deck removal or returning a Character to hand can remove your Characters without giving you that compensation. Gravity Blade is especially problematic for this reason.
Keep Shanks for situations where it truly opens your offense. It is especially effective against boards full of Blockers or when it lets you secure lethal.