
Monkey.D.Luffy OP12-015
Monkey.D.Luffy OP12-015 is the central piece you want in hand. It starts your 4 DON!! combo by revealing two Events from your hand to play Sanji ST31-001.
Search for your combo pieces, execute the 4 DON!! Luffy → Sanji line, then keep the pressure on while saving DON!! to protect your board.
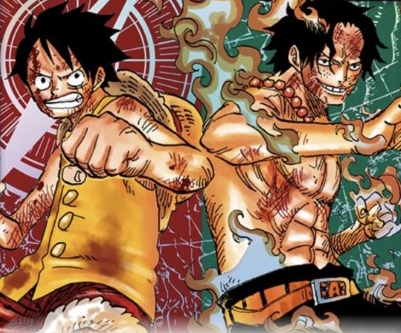
Above all, you need to assemble the pieces required for your 4 DON!! combo. The deck plays many searchers specifically to increase consistency, but it remains highly dependent on Monkey.D.Luffy OP12-015: when it is missing, your early turns become much more difficult.
Monkey.D.Luffy OP12-015 is the central piece you want in hand. It starts your 4 DON!! combo by revealing two Events from your hand to play Sanji ST31-001.
Sanji ST31-001 is also an important piece when you already have Luffy OP12-015 or enough searchers to find the missing pieces.
A hand containing part of the combo alongside a searcher can be kept.
You do not need to have every combo card immediately.
With Jewelry Bonney, Nami OP01-016, Nami EB02-017, and Thousand Sunny, the list has many ways to find the missing pieces. A hand without the full combo but with several searchers can therefore still be completely playable.
One combo piece is not necessarily enough.
The goal is to find a balance between combo pieces and the searchers that can recover the missing cards. When the deck does not find its combo, the game becomes noticeably harder; when it finds the combo quickly, its explosiveness is extremely high.
The deck generally prefers going second, mainly because it lets you reach the 4 DON!! needed for the classic combo immediately.
It can still play very well going first thanks to the extra DON!! generated by its effects and its many searchers. The choice also depends on the matchup: against Kaido OP17, Enel OP17, and Robin OP17, go first; against other matchups, go second. This flexibility is one of the deck's strengths.
The deck first wants to reach its combo turn with Monkey.D.Luffy OP12-015, then chain Luffy → Sanji → Luffy.
Use your first turns to play Jewelry Bonney, Nami, or Thousand Sunny and find the missing pieces. Your priority is to assemble Monkey.D.Luffy OP12-015 + Sanji ST31-001 + a Luffy for Sanji to play, while keeping the Events needed to activate Luffy OP12-015. If you already have some pieces, use your searches to complete the combo instead of needlessly finding more copies of the same cards.
This is your key turn. Play Monkey.D.Luffy OP12-015, then reveal two Events from your hand to play Sanji ST31-001. Sanji draws a card, then can play a Straw Hat with a cost of 5 or less. The classic combo then plays one of your other Monkey.D.Luffy cards. With the right sequence, Luffy OP12-015 gives Sanji a rested DON!!; if you play and attack with Luffy ST21-014, it can give Sanji another rested DON!!, allowing Sanji to gain Rush. For only 4 DON!!, this line produces multiple attacks: 6000 with the Leader, 6000 with Luffy, and 5000 with Sanji. This ability to put several attackers into play for only 4 DON!! makes the deck especially explosive.
When your hand contains every required piece, you can go much further. Start with Monkey.D.Luffy OP12-015, reveal two Events, and play Sanji. Sanji then plays another Luffy OP12-015, which starts another Sanji and then Luffy ST21-014 or Luffy ST30-012. The complete sequence can put up to five Characters on your board. Depending on the Luffy cards available, you can end the chain with your Rush Luffy or the other Luffy that can gain Rush and rest an opposing Blocker with its When Attacking effect. This full combo is much rarer on your first 4 DON!! turn and usually happens a turn later. The classic three-card combo is the line you will find most consistently.
Play Jewelry Bonney, Nami, or Thousand Sunny to find the missing pieces.
Keep searching for your combo pieces, just as you did on the first turn. Playing Thousand Sunny is important because, in addition to finding a card, it lets you give one rested DON!! to one of your Luffy cards, excluding your Leader, every turn.
Play your combo if you can. Compared with going second, you have had one additional turn to potentially find every piece of your full combo and put five Characters into play that turn.
Once your board is established, your goal becomes much more straightforward: send multiple attacks at the opposing Leader. Because your Leader is also 6000 Power, you can quickly create attacks that are difficult to defend when several Luffy and Sanji cards stay on the board.
You do not always need to use all of your DON!! offensively once your board is in play. The decklist has no 2000 Counters and relies heavily on its defensive Events, so keeping one or more DON!! available can be important for protecting your Characters and maintaining pressure on the following turn. Your Luffy cards also gain +3000 Power during the opposing turn through your Leader effect, making your board difficult to remove directly through attacks.
You Can Be My Samourai!! is played as a two-of to get value from your small searchers once they are no longer useful. After using Jewelry Bonney or Nami to find your combo pieces, you can rest them with this Event to draw two cards. This keeps you digging through the deck while giving Characters that have already done their job a second use. Some versions play even more searchers instead of You Can Be My Samourai!!, but this list prefers the Event to turn searchers that are no longer useful into card draw.
Its role in the deck is mainly to provide enough defense for a deck that cannot rely on many 2000 Counters. Giving your Leader +2000 Counter during a battle while reducing an opposing Leader or Character by 2000 Power for the entire turn is especially strong for limiting opposing pressure. For only 1 DON!!, this effect can potentially let you counter two attacks.
Like the other Events, it helps the deck keep enough Counter despite a decklist built mainly around searchers and combo pieces. During your turn, you can also use its Main effect for a total of 4 DON!! to rest up to two opposing cards, Characters and/or DON!!. This can make it a real finisher by resting opposing Blockers and/or the DON!! your opponent could use for defensive Events. Its 4 DON!! cost is also largely offset by Monkey.D.Luffy ST21-014 and Thousand Sunny ST31-005, which can recover rested DON!! by attaching them to your Characters for larger attacks.
In addition to defending your Leader, this card can, for 3 DON!!, freeze up to two opposing Characters with a cost of 7 or less. It can prepare a big turn by reducing opposing pressure and temporarily preventing certain Characters from attacking again.
Along with Gra ha ha ha ha OP17-017, this is the only Event in the decklist that can protect your board; the others only defend your Leader. This is not a major issue because your Luffy cards will be at 9000 Power during the opposing turn. This card gives +3000 Power by discarding a card from your hand, ideally a brick you no longer need or an Event you cannot play because you did not keep active DON!! for defense. Its -3000 Power Trigger can also be very useful. Although it is rare and outside your control, it can sometimes save you when your opponent tries to finish the game on their turn.
Thousand Sunny is one of the many searchers used to increase the deck's consistency. Once your board is developed, the Stage can also give a rested DON!! to a Luffy other than your Leader, helping set up your different attacks after the combo. It therefore fills two important roles: finding the pieces needed for your combo, then contributing to your pressure once your Characters are in play.
OP17.5 matchup spread for Luffy & Ace ST30.
Monkey.D.Luffy OP12-015 is the central piece of your combo. Use your many searchers to find it quickly, then find the other pieces you need around it. Without this Luffy, the deck quickly becomes much less explosive. This is one of its main weaknesses: when your searches do not find the right pieces, the game becomes much harder.
Once you have found your main pieces, your small searchers are no longer very useful. You Can Be My Samourai!! lets you rest them to draw and keep moving through your deck. This turns Characters that have become less useful into new cards instead of simply leaving them on the board.
Your deck becomes especially dangerous when the Luffy cards played through your combo survive until the next turn. Thanks to your Leader, your Luffy cards gain +3000 Power during the opposing turn, making them very difficult to remove through attacks. Your defensive Events can then be used when the opponent still tries to deal with your board.
Effects that rest opposing cards can become especially important when it is time to finish the game. Resting a Blocker opens the way for your many attacks. Once your board is established, preventing the opponent from using their defenses properly can be enough to turn your turn into lethal.
Once several attackers are in play, 7000-Power attacks are especially useful for forcing the opponent to use Counters. Several consecutive 7000-Power attacks gradually empty the opposing hand before the final push. You do not always need to look for lethal immediately: your board can first exhaust defensive resources.
The decklist plays no 2000 Counters and no Blockers, so it depends heavily on its Events for defense. Avoid automatically spending all of your DON!! if keeping a resource lets you protect an important board piece or survive the next turn.
The effects of Monkey.D.Luffy ST21-014 and Thousand Sunny ST31-005 let you get value from rested DON!!. This makes your sequences more efficient and helps absorb the cost of Events used during your turn before continuing your offense.
The deck generally prefers going second because you naturally reach the 4 DON!! needed for the main combo. It can still perform well going first thanks to its different rested DON!! recovery effects. Against Enel, Kaido, and Robin, prefer going first.